Trail Camera Setup for Scoring Deer with Blazevideo
Is there such an unbelievable marvel as an ideal path camera arrangement? Each property, each tracker, and each trail camera arrangement is clearly unique, yet is there an overall rule that trackers ought to keep? The basic response is yes! An ideal path hunting camera arrangement would be one that not just gives you precisely what you need as far as data, yet in addition, produces immaculate photographs and recordings. While the ideal path camera arrangement may sound unrealistic, or dependent upon a few exceptionally obstinate remarks, an arrangement exists that streamlines the intel got. How?
What is the most significant data you can get from a path camera photograph or video?
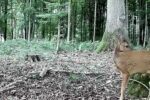
Is it the time, what number of deer, the moon stage, or the climate? While the vast majority of those are critical, the most significant thing a path camera can do is distinguish a singular buck. A hazy or amazingly far off a photograph of a buck is useless. Without realizing which buck has been caught, it’s futile to begin relating the other data (like date, time, climate, and so forth) These path camera tips and arrangement rules won’t just permit you to catch more bucks following right after you cameras, yet additionally catch better photographs and recordings to distinguish and even score individual bucks!
Instructions to Setup a Trail Camera “Accurately”
In any case, with a smidgen nibbled more information, that experience can be transformed into ability. Focus on the path camera tips beneath, and observe each progression of this rule to arrange your path camera impeccably!
Trail Camera Locations
Relax, I won’t begin this path camera tip off with the old land saying “area, area, area”. Notwithstanding, area is vital yet it’s not actually everything. The trail camera area is only the beginning. I accept that it ordinarily focuses you in the correct bearing. For the most part, you know the best spots to hang your camera. You may not have the foggiest idea about the specific tree, however, I would assume you know the particular section of land or so of ground you would put a camera. Regularly area isn’t the crucial step, it’s really the arrangement and hanging the path camera that stumps most trackers. Regardless of whether you get in inside the right section of land, the arrangement bearing, tallness, and distance can be off track from what it very to be at.
For those wishing to plunge into somewhat more real “tips” than clarification, my top path camera areas would spin around (contingent upon the season):
Runs
Pipes
Food Sources
Oak pads
Mock scratches
Lure stations/Mineral destinations for deer
Waterholes
Trail Camera Site Selection
We can limit the rule of trail camera area further into trail camera site choice. Again the issue with the overall term “area” is that inside the one-section of land region you have distinguished I may observe three distinct destinations I would put a camera. For instance, the primary site I could hang a camera on would be a run coming from a sheet material region, the following would be the edge of a plot, and the third may be a goliath local area scratch right outside of the plot and the run. By and large, site choice for your camera should be chosen by the most noteworthy likelihood of catching bucks. In this model, the season would clearly conclude where the camera would really go. Assuming it would turn out to be October, I would incline unequivocally towards the counterfeit scratch as there is a decent possibility any buck inside that section of land would aroma really take a look at that scratch.
Trail Camera Distance from Target
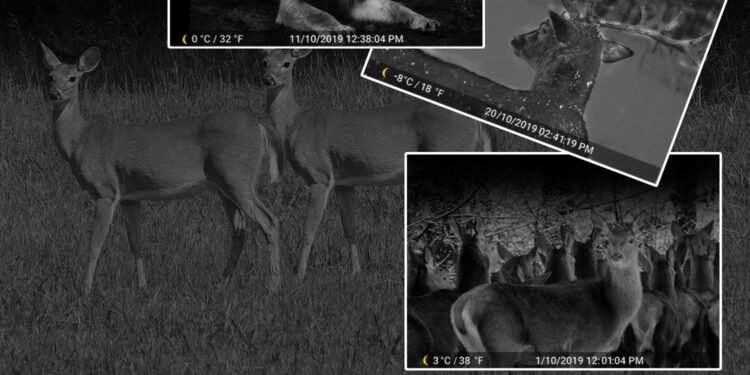
While enhancing a path game camera for the best pictures and recordings, you will need to really focus on the distance you are setting the camera from where you expect the deer being. For what reason is this significant? Indeed, even the best path camera photographs, 14 MP or higher, have where the buck can become hazy. This reality, with the expansion of a few restricted glimmer ranges, implies that you could have a few photographs or recordings that just catch development, yet neglect to uncover sufficient detail to distinguish a singular buck. Observing a guideline of thumb, 10 yards or less is the best ballpark for an ideal path camera video or picture. Most, assuming that not all, trail cameras have a glimmer range containing in excess of 30 ft. They additionally have sufficient lucidity to distinguish any buck inside 10 yards.
Presently you may be wondering, how in the world do I do that with something like an oak level or food plot? A fascination like snare or a counterfeit scratch can maneuver bucks into the right reach for a superior picture. This is the place where obviously distinguishing the objectives of the camera arrangement are significant. A path camera throughout a food plot on time-pass will just be for stock or “plot watching”, not really distinguishing individual bucks. Assuming catching individual buck development examples, conduct, and attributes for ID is your objective then, at that point, continue to track with these means.
For the motivations behind this article and general path camera tips, assuming that you are experiencing issues deciding distance, feel free to put a fake scratch. Clearly, this just relates to hunting season, yet mock scratches have turned into my beloved strategy for trail cameras over the recent years. The two bucks in the video are two of the best reasons I can offer! Trail camera is available for sale only at Blazevideo,